
Getting paid is one of the best parts of freelancing, but figuring out how to receive that payment can be confusing, especially if you’re working with clients abroad. This guide breaks down what works for Filipino freelancers based on real experience and research.
1. Upwork’s Built-In Payment System
If you’re working through Upwork, you’ll receive payments directly via their platform. They charge a flat 10% service fee across all contracts (previously it was tiered).
Once your balance clears, you can withdraw via:
- Direct to your local bank
- Transfer to a Wise account to make withdrawals more efficient and cost-effective
2. PayPal
PayPal is still widely used, especially for one-time clients or small projects. But from experience, it’s not the most freelancer-friendly in terms of fees.
What to expect:
- Transaction fees are around 4.4% plus a fixed amount
- Lower exchange rates than the market value
- Funds can be withdrawn to your PH bank, usually within 1–2 days
I keep a PayPal account active just in case a client prefers it, but I usually add in the fees to the invoice amount. Make sure you communicate this with your client.
3. Payoneer
Payoneer is popular with freelancers on platforms like Fiverr, 99designs, and Amazon Associates. While I haven’t personally used it, I looked into it while exploring other tools.
Based on my research:
- You get a virtual USD account, similar to Wise
- Withdrawal fees are generally higher than Wise
- Some freelancers mention slower processing or clunky interfaces
It’s a solid backup option if you’re on a platform that supports Payoneer directly, but not my top pick.
4. Bank Wire Transfers (SWIFT)
Some long-term clients, especially agencies or those based in more traditional industries, pay via international wire transfer. These payments go through the SWIFT network, which usually:
- Transfers go through the SWIFT network, which can take 3–5 days
- Sending and receiving bank fees can stack up quickly (up to $30–50 combined)
- Best used if you already have a USD account with a local PH bank
I opted not to use this method because of the high costs and delays, but I did experience receiving my payment through a Wire Transfer. I still got my full payment, which meant the client shouldered the fees. I introduced Wise to the client, and I think he was happy with the lower transaction fees and has used Wise since then.
5. Wise (What I Use and Recommend)
If you didn’t know it by now, my favorite way of transferring my payments is through Wise.
Why I love Wise:
- Lower fees and real exchange rates
- Multi-currency accounts, including USD and AUD (clients I’ve worked with)
- Fast, flexible withdrawals to PH banks
- Easy to connect with Upwork and direct clients
👉 Sign up for Wise and get a debit card
How to Set Up Your Wise Account (Step-by-Step)
Setting up your Wise account is super straightforward, and you only need to do it once. After that, it becomes your go-to for receiving payments in USD, converting to PHP, and transferring to your local PH bank account.
You can set up your Wise account straight from your phone in just a few minutes. Here’s a step-by-step guide.
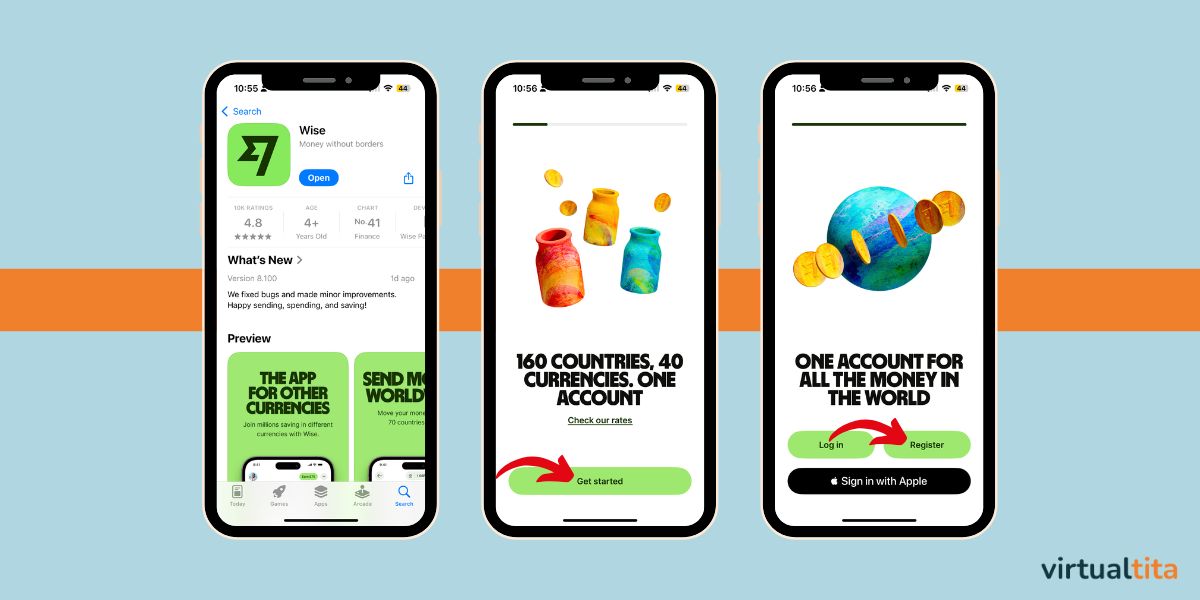
Download the Wise App
Search for Wise on the App Store or Google Play and download the app.
👉 Sign up for Wise and get a debit card
Tap “Get Started” and Begin Registration
Open the app and tap “Get Started,” then choose “Register” to begin creating your account.
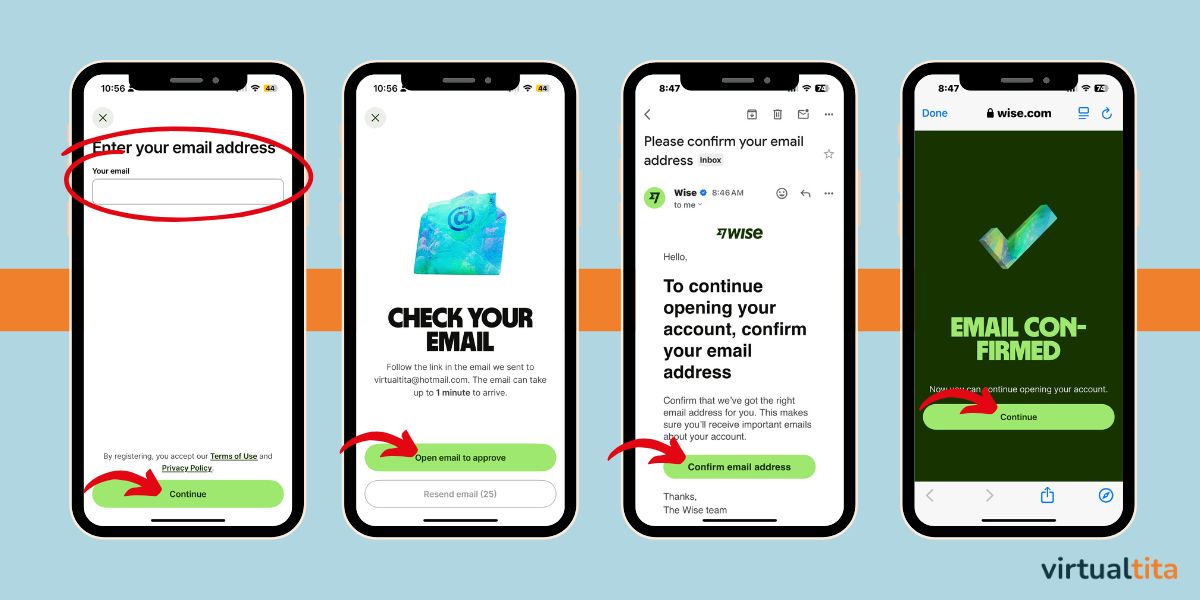
Enter Your Email
Type in your email address and tap “Continue.”
Confirm Your Email
Check your inbox for a message from Wise. Tap the “Confirm email address” button to verify and continue.
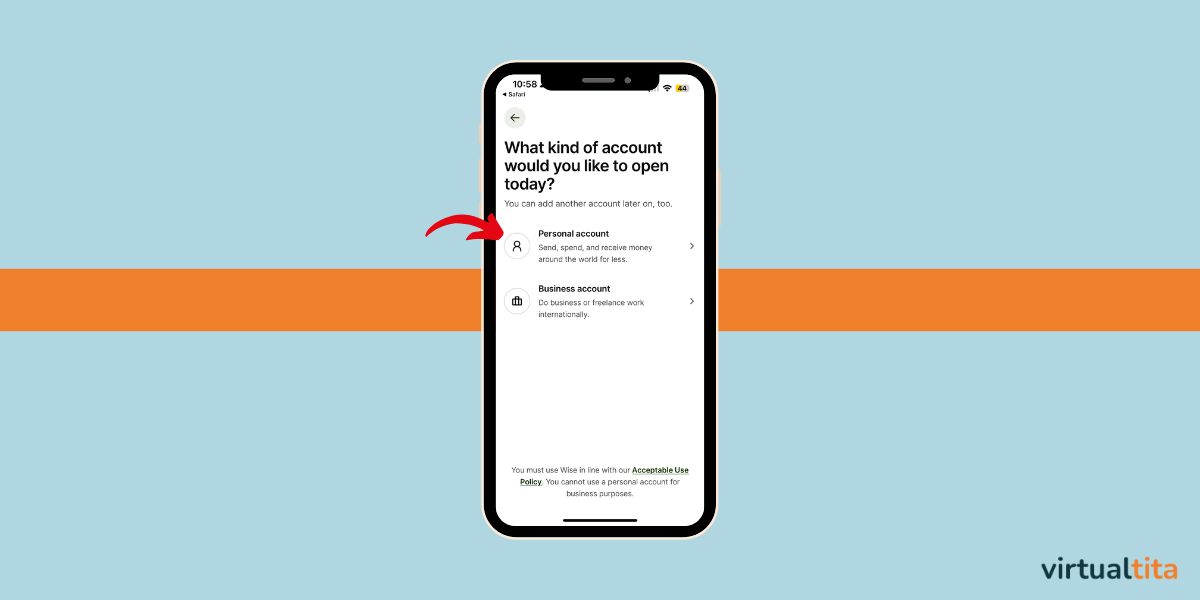
Choose Account Type
Select “Personal account” if you’re freelancing as an individual. (You can upgrade later if needed.)
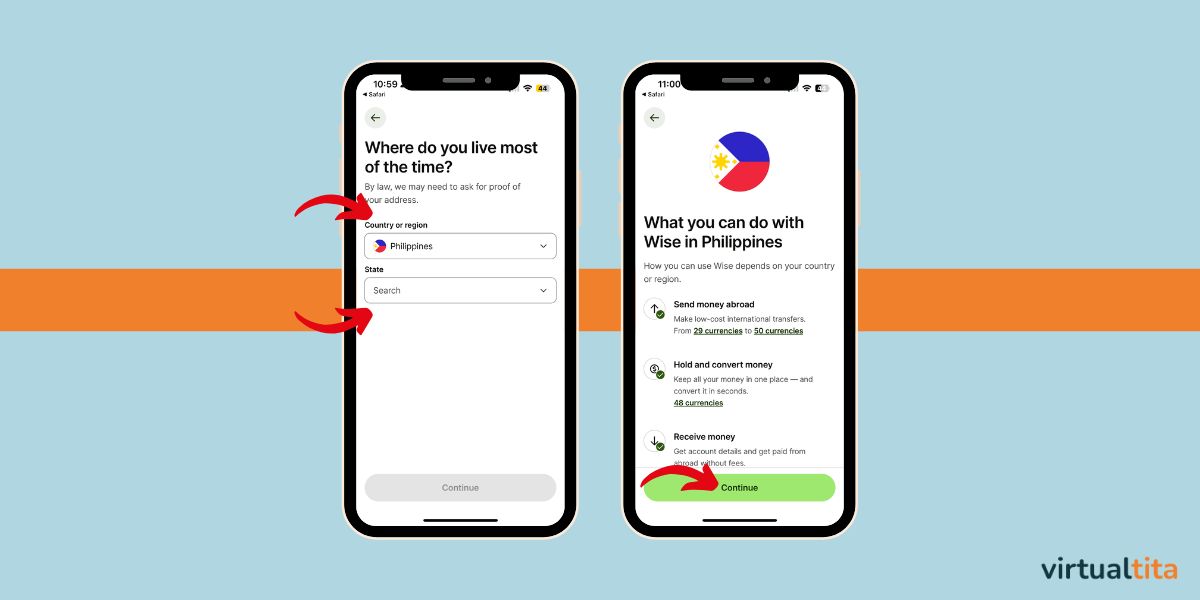
Set Your Country and State
Choose the Philippines as your country of residence. Then, choose the State where you are located.
You get a screen showing all the ways you can use Wise. Click Continue.
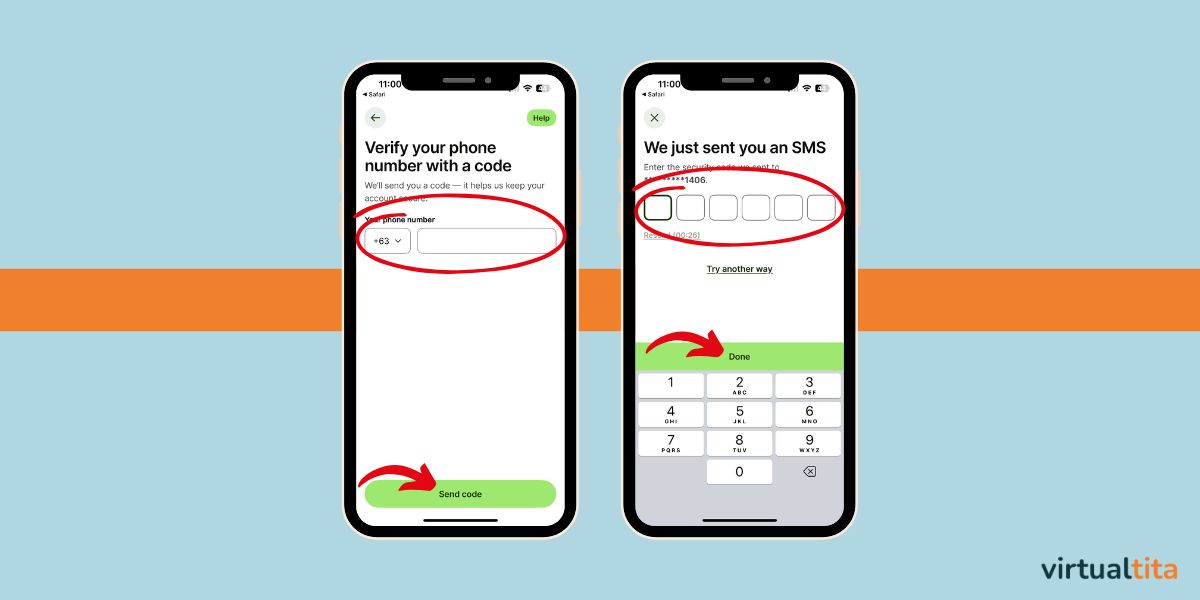
Verify Your Phone
Enter your mobile number and verify it via the SMS code sent to you.
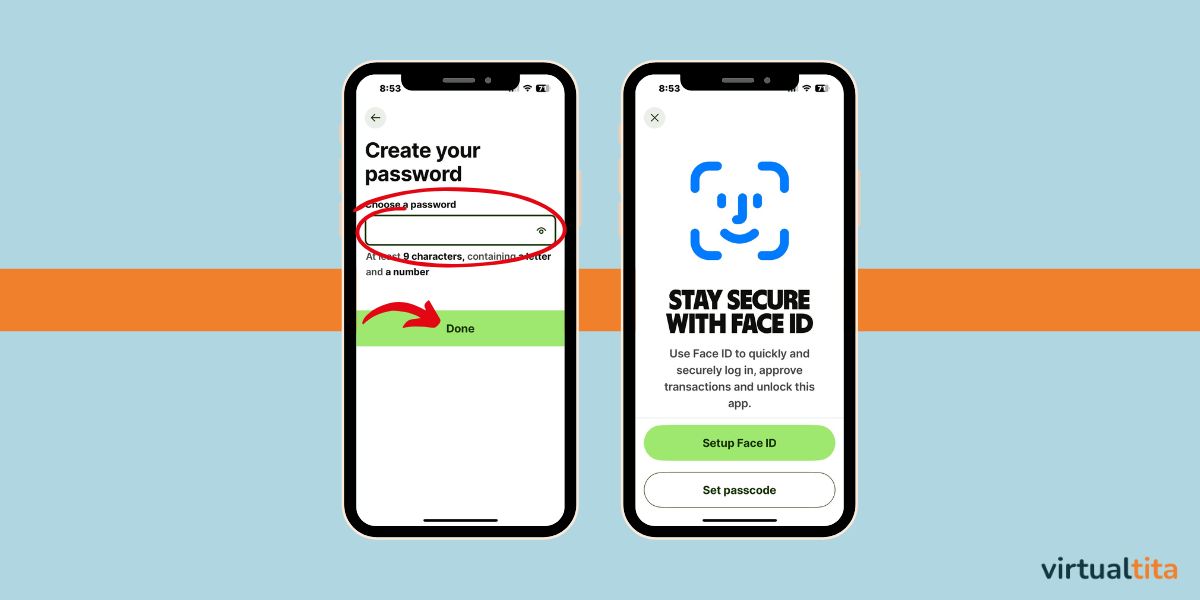
Create Your Password and Enable Security
Set a secure password, then choose whether to enable Face ID or set a passcode.
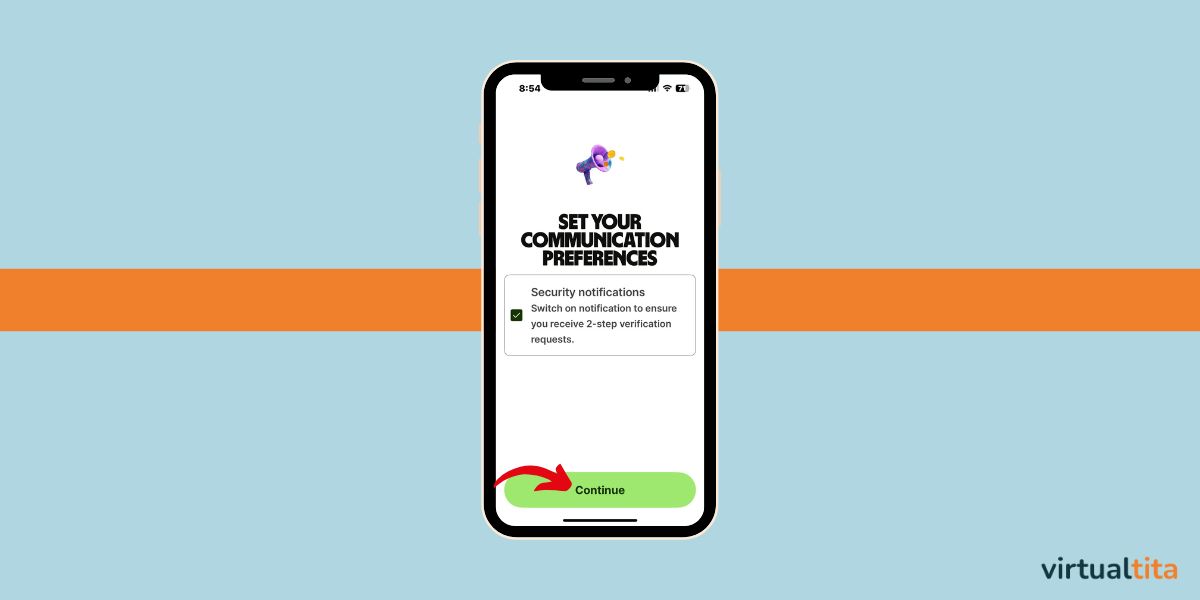
Set Your Communication Preference
I suggest you keep this checked to receive verification requests for security.
Fill in Your Personal Information and Address
Enter your full name, date of birth, and phone number as they appear on your valid ID. Also, provide your complete address. Please use a valid mailing address, as this may later be used for identity verification.

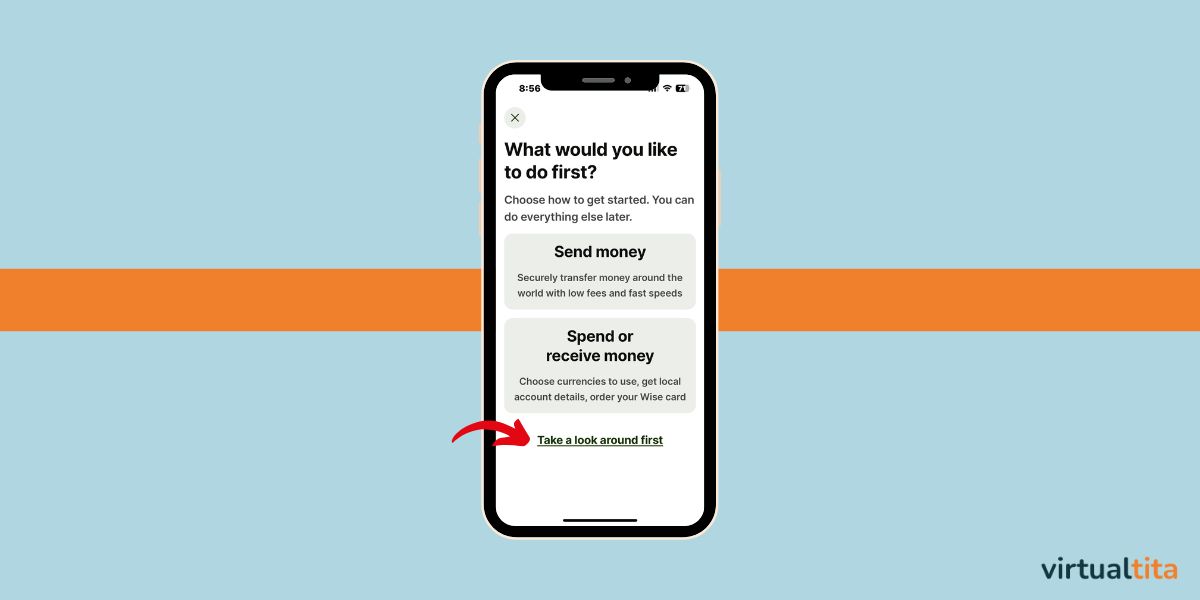
Choose What You Want to Do First
Wise will ask if you want to send money or receive money. You can tap either option or explore the app freely first.
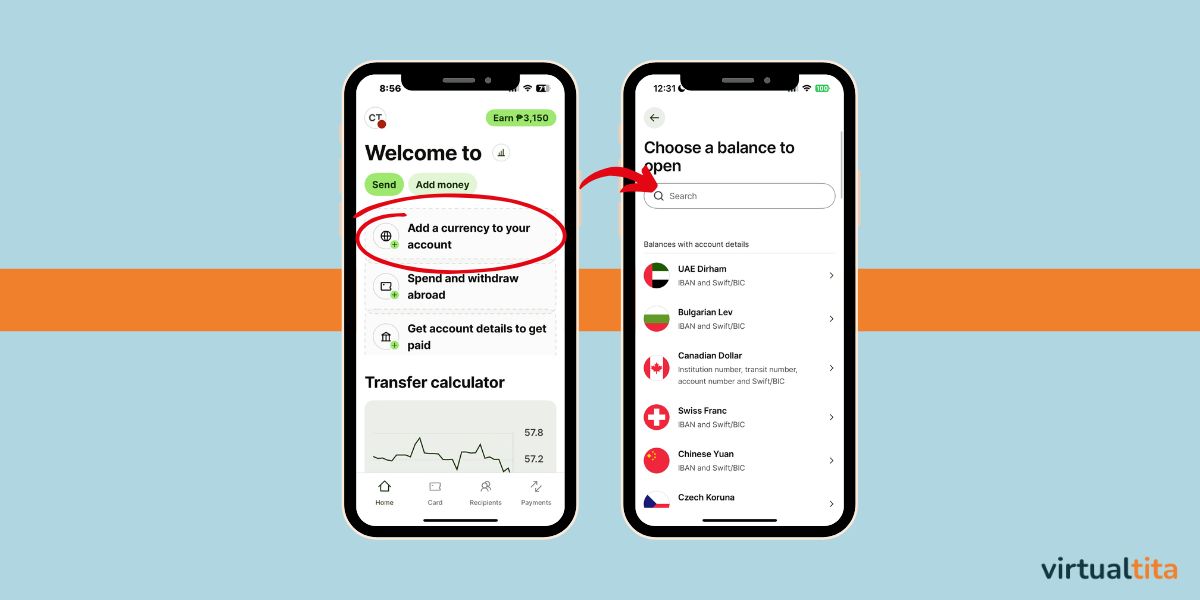
Add a Currency to Your Account
To begin receiving payments, add a currency balance for the currencies you accept, most commonly USD for freelancing. Don’t forget to add PHP as well, since it’s your local currency.
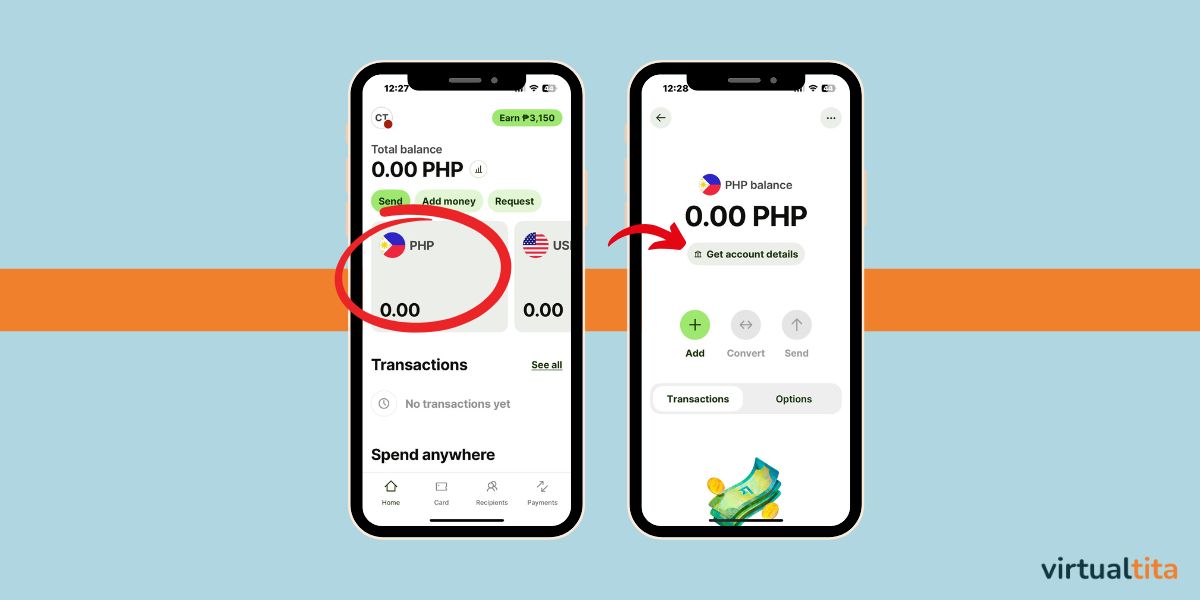
Access Your Account Details
Tap into your PHP or USD balance, then select “Get account details.”
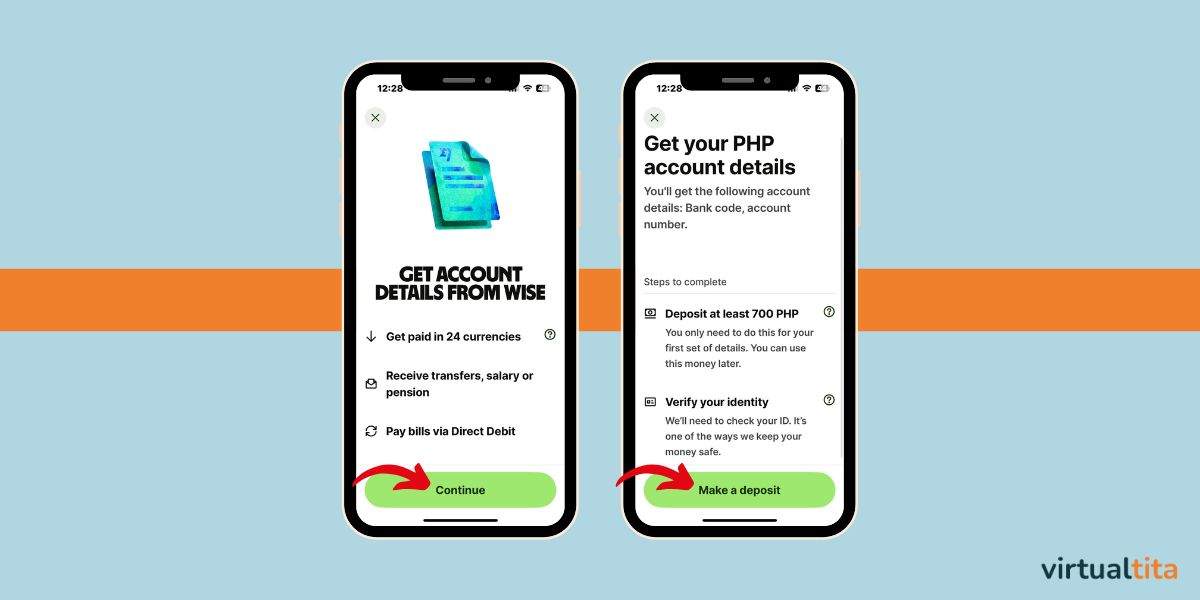
If your account is new, you’ll be asked to:
- Make a small deposit (₱700 minimum) to activate the account. Don’t worry, you can use this money later. This is also a way to connect your local bank account with Wise so you can easily transfer between the two accounts.
- Upload a valid ID for verification.
Once done, you’ll be able to receive payments directly into your Wise account. Or use your Wise for other transactions.
You’re All Set!
Once verified, you’ll have access to your Wise bank details. You can now:
- Get paid in USD or PHP
- Withdraw to any PH bank
- Use Wise for future investing that requires USD
My Tita Thoughts
There are many ways to get paid as a freelancer, but if you’re looking for something low-cost, flexible, and reliable, Wise has been the best option for me so far.
Set it up early so you’re ready when your first client asks: “How do I send the payment?”
Ready to get an account and enjoy lower transaction fees?
👉 Sign up for Wise and get a debit card
Have a question or just want to connect? Feel free to send me an email or follow along on Instagram @virtualtita. Let’s talk freelancing, personal finance, or anything in between. And if you’d like tips and stories delivered straight to your inbox, sign up for the newsletter below.